When publishing a podcast, loudness consistency is key. Listeners shouldn’t need to adjust their volume between episodes.
Adobe Audition’s Match Loudness panel solves this problem by automatically adjusting audio levels to professional loudness standards.
In this guide, you’ll learn how to use Match Loudness presets to master your podcast quickly and confidently — without over-compression or distortion.
1. What Is Match Loudness?
Match Loudness ensures that all your audio files reach the same perceived volume level, measured in LUFS (Loudness Units Full Scale).
🎧 Why it matters:
- Keeps your podcast consistent across episodes
- Meets platform standards like Spotify and Apple Podcasts
- Prevents clipping or overly quiet mixes
💡 Pro Tip: Most podcast platforms recommend a target of –16 LUFS for stereo or –19 LUFS for mono episodes.
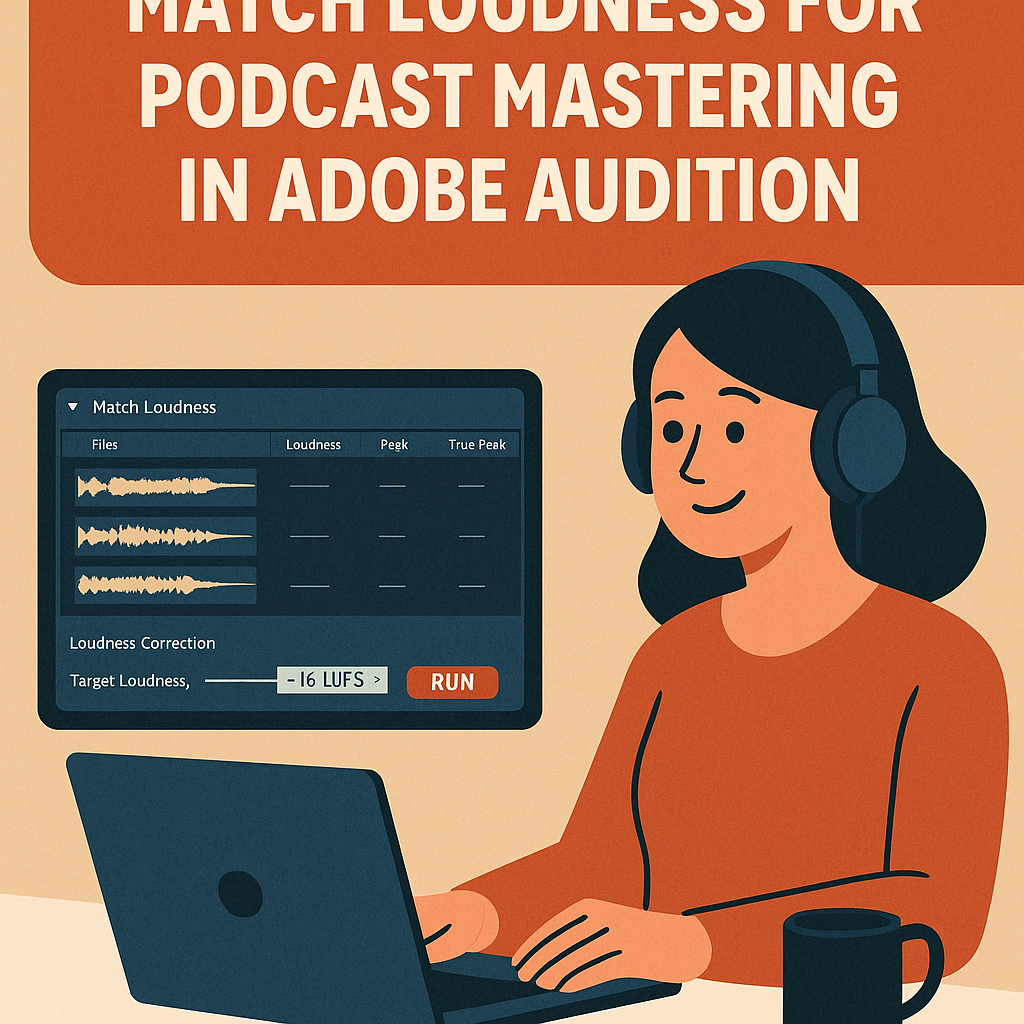
2. Access the Match Loudness Panel
- Open Adobe Audition.
- Go to Window → Match Loudness to display the panel.
- Drag your mastered mix (or multiple podcast files) into the panel’s file list.
You’ll now see each file with columns for “Loudness,” “Peak,” and “True Peak.”
3. Set a Target Loudness
Under the Loudness Correction section:
- Check Match To: and select ITU-R BS.1770-3 Loudness (the global broadcast standard).
- Set Target Loudness: to –16 LUFS.
- Optionally, enable True Peak Limiting and set it to –1.0 dB to avoid clipping.
🎙️ Tip: For mono podcasts, you can safely go for –19 LUFS.
4. Create a Match Loudness Preset
Once your settings are dialed in:
- Click the Preset dropdown in the Match Loudness panel.
- Choose Save Preset.
- Give it a clear name — for example:
- “🎧 Podcast –16 LUFS”
- “🎙️ Mono Podcast –19 LUFS”
Now you can apply this preset to future episodes in one click.
5. Batch Process Multiple Episodes
To master several episodes at once:
- Import all your final mixes into the Match Loudness panel.
- Select your custom preset from the dropdown.
- Click Run.
Audition automatically adjusts each file to meet your preset loudness standard — perfect for consistent episode libraries or re-releases.
💡 Pro Tip: You can also include metadata tagging and file renaming in this process to streamline publishing.
6. Verify Your Output
After processing, play back the mastered files:
- Voices should sound equally loud from episode to episode.
- No clipping or harshness should occur.
- Peaks should stay just under 0 dB.
If your episode sounds slightly “flattened,” try lowering the compression in your mastering chain before applying Match Loudness.
7. Combine Match Loudness with Preset Master Chains
For best results, combine Match Loudness with your custom mastering presets (from Article #23).
Example workflow:
- Apply your “Podcast Master Chain” rack preset.
- Export your mixdown.
- Use Match Loudness preset for the final loudness normalization.
This ensures both tonal quality and platform compliance.
8. Save Time with Batch Templates
If you release episodes frequently, save your entire loudness setup as a Batch Template:
- Click the Settings icon → Save as Template.
- Include your preset and output folder.
Every week, just drop your new episode in and click Run — no manual setup needed.
Conclusion
Match Loudness presets make podcast mastering fast, repeatable, and professional. By targeting the correct LUFS standard and automating loudness adjustment, you can confidently publish episodes that sound consistent across Spotify, Apple, and beyond — no more volume surprises for your listeners.
Next up: “How to Use Adobe Audition’s Essential Sound Panel for Automatic Voice Mixing.”
