Nothing distracts listeners faster than noisy or echoey dialogue. Whether you’re editing a podcast, a YouTube video, or a short film, Adobe Audition gives you the tools to clean up voice recordings and make them sound clear, natural, and professional.
In this guide, you’ll learn how to combine Noise Reduction and DeReverb to remove background noise and unwanted echo — without damaging the tone of the voice.
1. Start with a Clean Listening Environment
Before making any edits, isolate your problem.
- Use headphones to hear every detail.
- Turn on the Spectral Frequency Display (Shift + D) to visualize noise patterns.
- Zoom in on the quiet parts between words — if you see constant color bands, that’s your background noise.
💡 Pro Tip: Always keep a copy of your original audio. Noise removal is powerful, but heavy processing can sometimes flatten your sound.
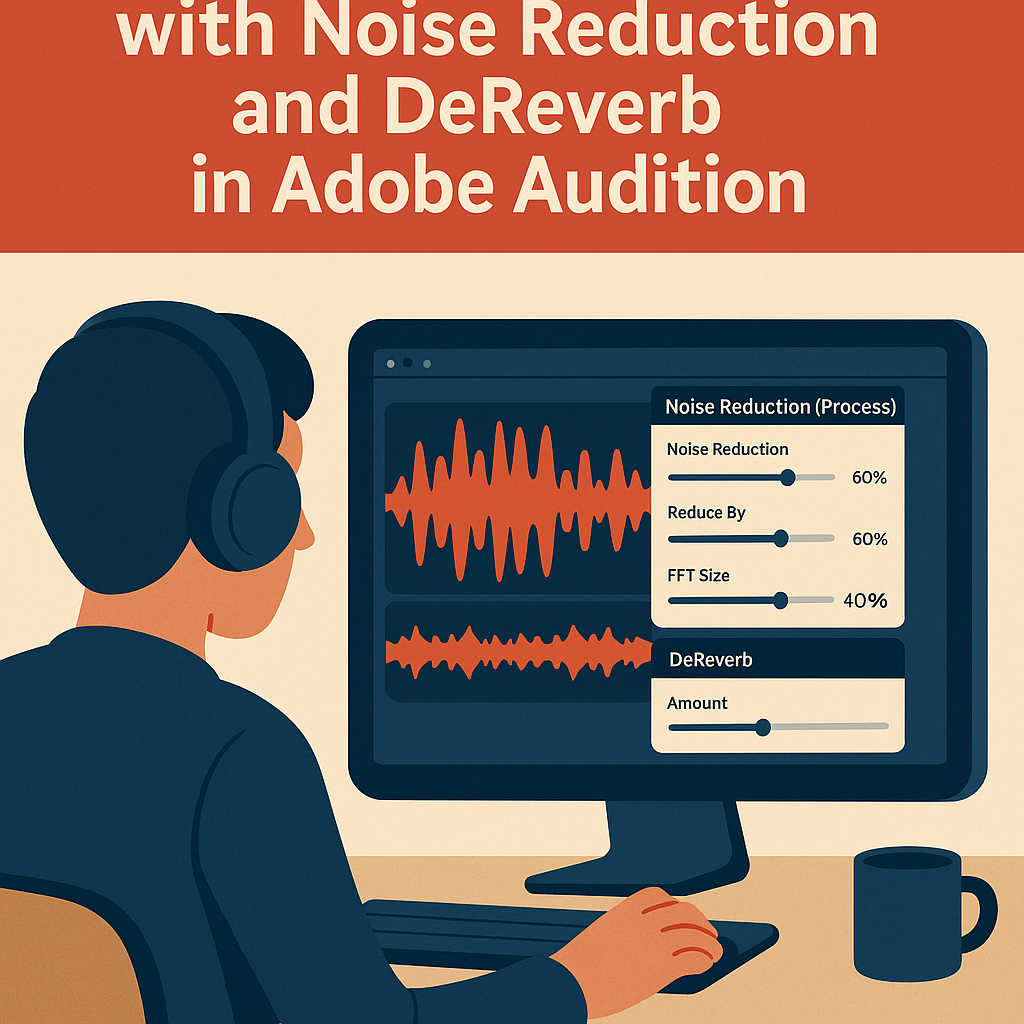
2. Apply Standard Noise Reduction
First, eliminate constant hum, hiss, or air noise.
- Select a short section with only noise (no speech).
- Go to Effects → Noise Reduction / Restoration → Capture Noise Print.
- Select the entire clip (Ctrl/Cmd + A).
- Open Noise Reduction (Process) again.
- Adjust:
- Noise Reduction: 50–60%
- Reduce By: 10–15 dB
- FFT Size: 2048
Click Preview to listen and tweak settings until your dialogue sounds natural but cleaner.
🎧 Tip: If your voice starts sounding robotic, reduce the “Noise Reduction” slider — you’ve gone too far.
3. Use Adaptive Noise Reduction (For Changing Environments)
For clips where the background noise varies — like outdoor interviews — use Adaptive Noise Reduction instead.
- Go to Effects → Noise Reduction / Restoration → Adaptive Noise Reduction.
- Start with the preset Light Noise Reduction.
- Fine-tune Noise Floor Offset and Signal Threshold until the background fades evenly.
This effect continuously analyzes and adjusts as your audio changes — no manual noise print needed.
4. Apply DeReverb to Reduce Echo
Next, remove unwanted room echo or reverb.
- Go to Effects → Noise Reduction / Restoration → DeReverb.
- Start with the preset Light Reverb Reduction.
- Adjust the Amount slider between 10–30% depending on how reflective the recording space was.
💬 Pro Tip: A small reduction often works best — overusing DeReverb can make voices sound “dry” or unnatural.
5. Use the Essential Sound Panel for Speed
If you prefer quick results, try the Essential Sound Panel instead:
- Tag your clip as Dialogue.
- Enable Repair Sound.
- Adjust Reduce Noise and Reduce Reverb sliders.
This one-stop panel applies professional-grade processing automatically — ideal for creators who need fast turnarounds.
6. Enhance with EQ and Compression
After cleaning up noise and echo, polish your dialogue for warmth and presence:
- Parametric EQ: Boost around 3–5 kHz for clarity.
- Compressor: Apply a gentle 2:1 ratio for smoother volume.
- Limiter: Set to -0.1 dB to avoid clipping.
Together, these tools bring your dialogue up to a broadcast-ready standard.
Conclusion
With Noise Reduction, DeReverb, and a touch of EQ and compression, Adobe Audition can transform imperfect voice recordings into professional-quality dialogue.
You’ll eliminate distractions, improve intelligibility, and keep your audience focused on your message — not your background noise.
Next up: “How to Export Dialogue for Podcast or Video in Adobe Audition.”
