Background noise can ruin an otherwise great recording — hums, hisses, or fans in the background can make even professional podcasts sound unpolished.
Luckily, Adobe Audition’s Adaptive Noise Reduction effect helps you clean up audio in real time by analyzing and reducing unwanted noise without affecting your dialogue.
In this guide, you’ll learn how to apply and fine-tune Adaptive Noise Reduction to instantly improve your recordings.
1. What Is Adaptive Noise Reduction?
Unlike traditional noise reduction (which requires you to “capture” a noise print), Adaptive Noise Reduction listens to your audio continuously and adjusts on the fly.
🎧 Best for:
- Live podcast recordings
- Interviews in noisy environments
- Audio with fluctuating background sounds (like air conditioners or traffic)
💡 Pro Tip: It’s called “adaptive” because it dynamically learns your noise profile in real time.
2. Open Your Audio File
- Launch Adobe Audition.
- Open your recorded audio in Waveform View.
- Play it once to identify sections with consistent background noise.
3. Apply Adaptive Noise Reduction
- Go to Effects → Noise Reduction/Restoration → Adaptive Noise Reduction.
- The Effect Settings Panel will open.
- Play your audio and listen as Audition automatically analyzes the noise.
You’ll hear improvement immediately — but let’s make it sound even better.
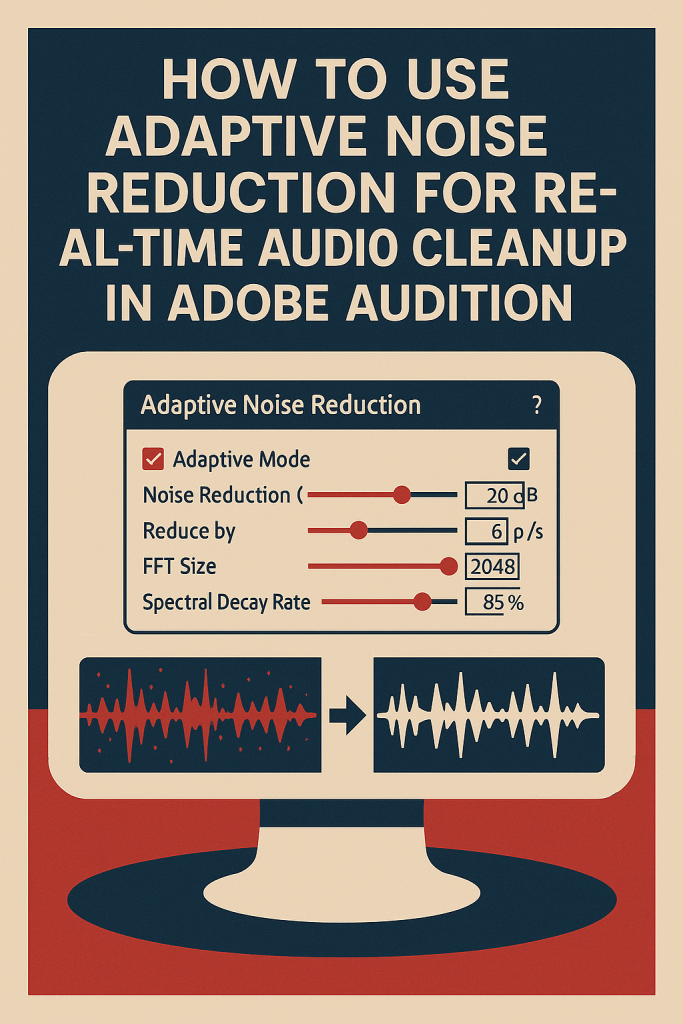
4. Adjust Key Settings
Here’s how to get clean results without making your audio sound unnatural:
Noise Reduction (dB):
- Controls how much noise is removed.
- Start around 15–25 dB for subtle cleanup.
- Higher settings can cause “swirling” or metallic artifacts.
Reduce by dB per Second:
- Determines how fast the algorithm adapts to changes.
- Use 3–6 dB/s for steady environments.
- Increase for fluctuating background noise (like outdoor recordings).
FFT Size:
- Affects frequency precision.
- Higher values (2048–4096) give cleaner results but require more processing.
Spectral Decay Rate:
- Controls how quickly sound fades after noise removal.
- Keep between 65–85% for natural-sounding speech.
💡 Pro Tip: Keep “Adaptive Mode” checked so Audition keeps learning throughout playback.
5. Use Preview to Fine-Tune
Click Play and adjust sliders live while listening.
Pay close attention to:
- Speech clarity
- Background smoothness
- Unnatural “robotic” tones
🎧 The goal is balance — reduce noise while keeping the voice full and warm.
6. Combine with Parametric EQ
After noise cleanup, enhance the voice tone:
- Go to Effects → Filter and EQ → Parametric Equalizer.
- Use the Vocal Enhancer preset.
- Slightly boost 3–5 kHz for brightness and cut below 80 Hz to remove low rumble.
💡 This gives your cleaned audio a crisp, studio-like presence.
7. Apply Adaptive Noise Reduction in Multitrack View
You can also apply it directly to clips in your multitrack session:
- Select a clip.
- Open Effects Rack → Noise Reduction/Restoration → Adaptive Noise Reduction.
- Adjust parameters while monitoring your mix.
🎧 Great for real-time podcast recording or editing environments.
8. Automate Noise Control
For different segments (e.g., intro vs. interview), automate your effect:
- Click the Show Envelopes button on the clip.
- Choose Effect Parameter → Noise Reduction (dB).
- Add keyframes to vary intensity across time.
💡 Pro Tip: Reduce noise less during music beds and more during dialogue.
9. Save as a Custom Preset
Once you find the perfect settings:
- Click the Presets dropdown in the Adaptive Noise Reduction window.
- Choose Save Settings As.
- Name it (e.g., Podcast Cleanup Preset).
Next time, apply it instantly to any file.
10. Export the Clean Audio
When you’re happy with the results:
- Go to File → Export → File.
- Choose Format: WAV (48 kHz, 24-bit).
- Click OK.
🎧 For publishing, you can later convert this to MP3 (192 kbps) while preserving the improved quality.
Conclusion
Adaptive Noise Reduction in Adobe Audition is one of the most powerful real-time tools for podcast and voice editing.
With just a few adjustments, you can eliminate unwanted background sounds while keeping your audio natural and listener-friendly.
Next up: “How to Use Spectral Frequency Display to Remove Clicks and Pops in Adobe Audition.”
